Showing posts with label House Tour. Show all posts

Monday, October 27, 2014

Year Two in Review

Two years in the house! I'd say this is a landmark for H and I. We have never lived in the same place for more than a year, maybe year and a half TOPS! And that is dating all the way back to Freshman year of College. Each of us has moved at least once a year since then, if not twice a year. I can honestly say it feels so good to finally set down some roots.

This time last year I made a list of all the things H and I completed in the house so I thought it would be a good idea to continue the tradition. It's great to look back on everything we have accomplished and check some things off our Whole House List. I update that list at the very beginning of the year and post about the things I would like to accomplish next. Now, some of the things on this list I didn't get a chance to post about here on the Blog, but that is only because the photos are being held captive on my Nikon and with the computer working on a day by day basis, it has been a challenge. One day, they will get here, I promise.

This year we have ...

1 - Finished painting the Kitchen
2 - Painted the Family Room
3 - Put up crown molding in the Family Room to hide the speaker wires, check that out here
4 - Updated the Breakfast Nook with new chairs and rug, see it here - we also got a new light fixture not shown in this post
5 - Installed an electric fence for Pepper - money well spent if I do say so myself
6 - Installed shelving/decor to the Butler's Pantry area, check it out here
7 - Purchased a large sectional for the Family Room, posted here but later had lots of added drama
8 - Painted and decorated the front room, see it here
9 - Selected a paint color for the foyer and powder room, check those out here
10 - And had the painter in to paint these spaces
11 - Painted the guest bathroom and added a new shower curtain/towels
12 - Decorated the powder room - photos coming soon
13 - Hired a professional to design and install a huge patio for our backyard - I have before and after pictures just waiting to share
14 - Purchased and installed frames for a gallery wall in the upstairs hallway, see it here - though the frames aren't totally filled yet
15 - Started to decorate the entry way with new rugs/tables/a bench - photos coming soon
16 - Added seating to our front patio, check it out here
17 - Installed curtains and hardware for the bay window in the breakfast nook - though I still need to hem them

Then just this past weekend we...

18 - Planted some mature boxwoods up front to hide the lattice of our porch as well as two arborvitae to add some landscaping to the patio - post coming soon
19 - Purchased a new light fixture for the dining room, it's still in the box but it will be up by the end of the week

It is amazing to see what we have done in just this last year. That, combined with the first year in our home shows that this house is starting to come together. I can definitely say that it is feeling a lot like our home now and not just some house we live in. It's a great feeling! Now I just need to find the time to update my Home Tour Page to reflect all those great changes!

Sorry again that I haven't been able to post about all the changes we have done this year. A lot has happened in our lives that have kept us busy and the technology meltdowns we've had haven't helped. Hopefully I can get some of those photos off the camera one project at a time and post as I go. I have so much to share, I just hope that the computer holds out long enough to get the job done.

Until next time,
JP

Friday, August 22, 2014

Home Improvement Budgeting

So, I was reading this post over at Teal & Lime that talked about budgeting and spending money on home improvements. It summed up exactly how I feel every time I spend a little bit of money on our home. For example, I have had my eye on this bench from Target, yes, Target. Not Ethan Allen or Raymour - Target. At full price it's not expensive but it's still more than I feel comfortable spending. In the grand scheme of things, the price isn't so bad (especially since I never buy anything at full price, waiting for a sale is always the way to go!) With all that being said, I have been looking at this bench for months. It has gone on sale, gone off sale, been back ordered, back in stock, and there was even a point where I thought it was going to be discontinued. I never pulled the trigger. Why? Because spending any kind of money for a piece of furniture that we don't need is really hard to justify.

H and I are BIG budget people. We have pretty much every dollar of what we earn designated for a specific category like the mortgage, cable, food, car payment, etc. We know where our money goes every month which is why I know we are ahead of the game. It took us a while to get there but we finally have a budget and we are sticking to it. We also have a "home improvement" budget that we try to keep to. That includes random trips to Lowes and we never walk out of there spending less than $100. I don't know how they do it, but they seriously suck the money right out of my wallet! I'm getting off track here. What I am trying to express is that Teal & Lime really made me realize that it's OK to spend a little money on our home.

If you want to read the full post check it out here. I highly recommend reading it, and the other posts on this blog too! But one thing I want to highlight from this post was that we spend so much money yearly on random things like haircuts, gym memberships, car payments, you name it. We invest in ourselves so why don't we invest in our house? Now, I'm not talking frivolous spending, I'm talking significant purchases that will make a difference in our home and our everyday life.

This is how I justify spending a little bit of money on the place I call home. Try to ask yourself these few questions next time you are shopping for your home:


  • Is it going to make an otherwise unusable space usable?
  • Is it something I have had my eye on for a while now and is finally on sale to a point that I can justify spending that amount of money on that particular item?
  • Is it the one piece that will tie everything together? (we all know how difficult that is to find)
  • Does it fit into my budget?

That last one is the kicker! Like I said, H and I have a set budget for what we feel we are comfortable spending in a given month on our home, but that doesn't mean we don't ever make a bigger purchase. We just try to plan ahead for it. So maybe I won't buy anything for a few months and then I will have enough to purchase that piece of furniture that I have had my eye on but was too pricey to begin with. I still ask myself those other questions to see if it is truly worth my hard earned money but it helps to know that we can afford it and aren't breaking the bank just to get our house in order. 

It is still tough for me to pull the trigger on certain things (like that Target bench), but budgeting really does help. Now, I could do a whole series on budgeting because it really is a beast on it's own but that is another story for another day. Decorating your home on a budget can be a daunting task. It's so overwhelming with the "but it's so expensive" or "I want to do it right, so I am going to just wait" or "why start at all if we can't afford to finish it". People, it doesn't have to be that way! If you budget home improvements into your monthly expenses and use that money for your home, then before you know it, your house will start to take form. And you will be happier for it, trust me! 

Happy Friday!
JP


Friday, August 8, 2014

It's My Blogiversary!

It's been one year! One whole year of blogging! I can't believe how fast the time flies. This year was a great year for us. We got so much done in the house and managed to keep our sanity (and some money in our pockets). Looking back, I now remember why I started this blog - to have an outlet for everyday life. I also wanted to write about our home progress in hopes it would be a way to hold myself accountable for continuing to do stuff around the house. It is so easy to put things off and then before you know it, BAM, a year has gone by and nothing has gotten done. The opposite is also true though, that if you move too fast you could make bad decisions or wind up spending more than you needed to. For us, I think we have found a happy medium (that leans towards the quicker-paced side) and it works for us. Everyone is different.

Moving into a new construction home has also allowed us to start with a blank canvas, but this, like everything else, has its ups and downs. We have done some smaller projects and some bigger ones this year, always inching closer to the final product. Seriously though, who am I kidding? It will never be "finished". Having a home is like having a never ending to-do list. Slowly, but surely, it will get there. One project at a time. H and I are just enjoying the ride. Annnd cookin' up some good eats in the mean time : )

So here is a list of my top five posts from this first year of blogging. Enjoy!

  1. Life Under Construction - This is where is all started. Building our house from the bottom up was a great experience. It was so exciting to see the progress each week as we inched closer to home ownership. 
  2. First Year in Review - I have a sweet spot for this post, mainly because of my love for lists. Though I have only been blogging for a year, H and I have been in the house for almost two now so we were doing projects before The JP Project even got started. It was so great to see everything we accomplished in the first year of owning our home and was a great way to see just how far we have come.
  3. Our Crowning Achievement - In this post H and I (mainly H) tackled a huge project in our home, the living room. H had to have surround sound and I had to have character. The solution - crown molding : ) This was our first attempt and we really learned a lot through the process so next time it will hopefully run a little smoother.
  4. The Final CrossFit Friday - I chose this post because I am so very proud of H and I for accomplishing this goal. We had been wanting to try CrossFit for a while and in this post I talked about how we made it through the into-classes and graduated onto the real deal. I seriously need to write an update one of these days because we are still at it and working harder than ever!
  5. Red Velvet Crinkle Cookies - I couldn't have a Top Five without my all time favorite cookies! These are seriously the best. Stop reading my blog and just go make them. Like now ; )

Well, there you have it. Five of my favorite posts from this first year of blogging. It was really hard to narrow it down but I think these are a few good stand-out posts. If you enjoyed reading them I hope you continue to follow me here at The JP Project. This next year is already shaping up to be one of the best yet!

Thanks everyone for reading and supporting my blog!
JP

Wednesday, July 9, 2014

A Yard Sale Find and Some Disappointing News about our Mac...

So first, let's talk about how our MacBook is dying a slow and painful death. Ugh, this is so frustrating. One minute I think the computer is fixed, ready to go and the next... blue screen of death. While H and I were able to frantically save every last photo and important document to our external drive, there still is not enough space on this computer to run properly. I don't know what is going on, but every few minutes it gives me this message to shut down and reboot which is beyond annoying when you are trying to edit photos. This has been going on for the last few weeks which is why I haven't posted much lately. But I officially give up. I am just going to use my iPhone to take pictures for my posts until this computer situation figures itself out. 

With that in mind here are some iPhone photos of a little DIY project that made a huge difference for our front porch:

This time of year is great for yard sales! I'm telling you, go to yard sales. You can find some great pieces for really low prices. Yea, they may need a little work, but a low price tag makes it worth it. And you get to try out your haggling skills. Me, I'm not the best at negotiating price, but the one piece of advice I can give you is ALWAYS offer a lower price than what they are trying to sell it for. You would be surprised how many people just want to get rid of stuff and will take anything they can get!

A few local neighborhoods in our area have annual yard sales and this was the first year we were able to go. That's where we found two of these babies...


Super cheap at $50 for the pair, combined with another couple bucks in spray paint, and an entire day of cleaning them up and applying coat after coat, they now look like this...


Way better, right? I used three coats of a soft black outdoor spray paint followed by two coats of a clear sealant. Wicker is tough because though it looks like outdoor friendly furniture, they aren't waterproof at all. Wicker is prone to mold and mildew if it gets wet and doesn't dry completely. So I had to be careful to clean them up really well and apply the appropriate paint. We are also keeping them on our covered porch to shield them as much as possible from the rain. Hopefully that does the trick and we can enjoy these for years to come.

I also purchased two cushions from Pier One during their outdoor sale last week. Originally, I wanted white, but H vetoed that real fast. White gets so dirty and since they are going to be outside he convinced me to go with a darker cushion. Now all we need are a few bright pillows and a side table to tie everything together.


Here is the inspiration for what I want our porch to look like. I know, I know, I'm not there yet. But I am one step closer. I already have my eye on a side table that is currently in our "catch all" room not being used. I just need to waterproof it before bringing it outside. Once I have a free day, that will be the next project on my list : )

Well, hopefully the computer situation gets worked out, but until then, expect some mediocre photos of the updates we've been doing around the house. At least I'll be able to post more often.
{Think positive}

JP

Sunday, May 18, 2014

Updated Front Room

So remember way back when in February when I mentioned not having enough memory on the computer to edit photos? Yea, well I think we have finally remedied that situation and I can finally post about our FREE front room update!

Before...
After...
 Here are a few more...


By using left over paint from the dining room we were able to barely get this room painted. I mean, we were down to the last drop of paint! I think it provides some balance with the dining room having such a dark color too. The foyer is painted a lighter color (though not in this picture) which compliments it nicely. We used all the furniture that was in the family room and moved it here in anticipation of the new sectional, which still isn't resolved yet! Another story for another day.


This couch, the pillows, and the artwork were all from our apartment in the city, hence the "City Scape" artwork. I found these bad boys on the streets of New York. The artist uses subway maps and paints over them with interesting buildings and landmarks from around NYC. They were super cheap and perfect to bring some color into our oh so drab apartment. I repurposed them in this room just to add something to the walls. While this isn't my ideal artwork, it spices up the room a bit so it works for now.


If you look closely, you can see that one of the frames has glass, and one doesn't. This is thanks to moving them one too many times. I was so bummed when I saw the broken glass upstairs where we kept them. It was disappointing to say the least. But, whatever, they got hung anyway. I plan to go to Michael's where I got the frames and just buy another one, but I couldn't very well hang just one, so for now, this is how they will stay. The desk area is another work in progress...


This is a better view of the desk, but we know that it won't stay like this forever. We have visions of built-ins along the back wall with a free standing executive desk in the middle of the room. Visions and dreams aside, this little guy is better than nothing! It is nice to have a dedicated space to pay bills or to just use the computer or make a phone call in peace without having to compete with the TV. It also houses our Penn State Degrees. That is until we decide to splurge on nice frames to display them properly. 

Over all, I think this space is a huge improvement from what is was! We still have a long way to go before calling this room finished, but those are mostly big projects (i.e. big $) that are going to take time. For now, it is a more inviting, usable space that we will enjoy for the next year or two until we get around to getting those built-ins completed.

More updates to come...

JP

Thursday, January 9, 2014

After Holiday Furniture Shopping

H and I have been looking for a sectional for our family room, but unfortunately, they can be crazy expensive. We saw this one a while back, but the $3000+ price tag was no bueno. Plus, it was stuffed with feathers so that wouldn't be good for me. We looked at a few more, but they were either too expensive or just not right for the look I was going for.

Since we already had two couches, one from our old apartment and one as a hand me down, we weren't really in dire need of getting a brand new sectional. I just figured that eventually we would find something that fits our style and our budget and until then we would make due with what we had.

Then came this brilliant idea I had to search at Macy's where we purchased our first couch that we fell in love with years ago {imagine the light bulb going off} and sure enough they had a great sectional, still a little pricey, but boy was it pretty. I know Macy's always has great sales so I just decided I would keep an eye on it and see if the price comes down before I get my heart set on anything.

Fast forward a few months, add one hefty after holiday sale, and BAM,... we have a new sectional! : )

ours will be a slightly darker grey

Of course before we bought the couch we moved our current furniture out of the room and put down some tape to outline the dimensions of the sectional just to make sure it would fit comfortably in the space. Sure enough it was a winner. We also got an amazing deal, like half price amazing, putting it well into our 'we can afford this' range. One down fall, it's on back order. Womp womp. 

So we have to wait to get our new couch until the end of the month or even possibly in February some time. But that's ok, what's another month or so at this point?

One step closer to finishing another space in this never ending project of a house! Cue fist pump.

Happy after holiday shopping!
JP


Friday, January 3, 2014

A New Year Means a New List...

Ok so here goes nothing... I am attempting to make a list (or series of lists) for the entire house. Yup, one big "To Do" list. I saw this on Young House Love and I think it's a great way to see the big picture. Then, even if you are all over the place with projects (yea, that's me) or just doing a few Phase One updates that should translate down the road to a final product, at least you can see where all your free time (and money) is going. Hopefully this will give us a better idea of what needs to get done first, and where, so we can focus our energy on the tasks that are most important.

Disclaimer: I am going to list things as if we haven't done anything in the house. As of now we have done a good amount of work but I want to see where we started, and besides it will make me feel better that some things will get crossed off the list immediately : )


Outside Back: 15% complete
- Get the back and side yards regraded
- Put in a fence or something to contain Pepper
- Plant some trees for privacy along the property line
- Deck or patio?
- Covered porch?
- Fire pit or fireplace?
- Install some brighter lights for the back yard
- Build a shed
- Build a container to store the garbage/recycle cans


Outside Front/Porch: 2% complete
- Get some landscaping in those planter beds
- Add stone or pavers to edge the beds nicely
- Install spot lights for the house facade
- Change out the porch light fixtures
- Add seating and maybe a small table on the porch
- Maybe add some planters or planter boxes?


Foyer: 0% complete
- Paint!!
- Get an entry/console table and bench
- Add artwork/wall decor
- Maybe get some more indoor plants to make the space more inviting?
- Add trim/molding to the archways between the foyer and each room
- Change out the light fixture
- Purchase a rug and/or runner


Powder Room: 0% complete
- Paint
- Stencil the back wall?
- Add artwork/wall decor
- Change out the light fixture and maybe the mirror?
- Add some shelves
- Change out the toilet paper holder (long story)


Dining Room: 60% complete
- Paint
- Add molding/wainscoting to the bottom half of walls
- Get a table and chairs
- Add a large mirror to the far wall
- Add artwork/wall decor
- Purchase and install window treatments and hardware
- Purchase and install blinds
- Add a console table
- Get a large rug?
- Purchase/install a new light fixture
- Find some nice head chairs 
 {see it here}


Butler's Pantry: 95% complete
- Paint 
- Install cabinets we already have 
- Buy and install granite to match the kitchen
- Buy and install upper cabinets? <- naa, just shelves
- Purchase a wine frig
- Add artwork/wall decor  <- could use extra little details
- Add hardware to the cabinets
- Add track lighting
 {see it here and here}


Breakfast Nook: 15% complete
- Paint
- Buy a table and chairs
- Get a large rug
- Add window treatments of some sort (maybe shutters)
- Change out the light fixture
- Add a command center
- Maybe buy a bench?
- Create a little eating area for Pepper
 {see it here}


Kitchen: 75% complete
- Paint
- Purchase and install a refrigerator
- Add hardware to the cabinets
- Get some organization for the cabinets and drawers (including the pantry)
- Pick out tile and install a backsplash


Family Room: 20% complete
- Paint
- Purchase a sectional
- Get a TV console table
- Mount TV to wall above fireplace
- Add surround sound and buy a receiver
- Run wire behind walls (or) hide them in some other way <- with crown!
- Finish furnishing the room - accent chairs, side tables, ottoman, etc.
- Add artwork/wall decor
- Purchase and install window treatments and hardware
- Purchase and install blinds
- Hardwood (someday)
 {see it here}


Office/Den/Study/Front Room/Whatever we decide to call it that day: 2% complete
- Paint
- Add built-ins to the far wall
- Get a nice large desk
- Add some comfy reading chairs
- Add an overhead light
- Hardwood (someday)
- Add artwork/wall decor
- Purchase and install window treatments and hardware
- Purchase and install blinds
- Run cable wire to the room


Upstairs Hallway: 0% complete
- Paint
- Change out light fixtures
- Add photo wall with lots of frames
- Add artwork/wall decor
- Maybe get a small side table and mirror for the one corner?


Guest Bedroom: 40% complete
- Paint
- Install headboard on far wall
- Get a bed, dresser, and night stand
- Add artwork/wall decor
- Purchase and install window treatments and hardware
- Purchase and install blinds
- Run cable wire to the room


Guest Bathroom: 0% complete
- Paint
- Purchase all the fun things like a shower curtain, towels, etc.
- Add artwork/wall decor
- Paint/refinish the vanity
- Frame out the mirror
- Change out the light fixture?


Master Bedroom: 75% complete
- Paint
- Purchase a bedroom set
- Get nice bedding and pillows
- Get love seat refinished
- Buy accent furniture like a chair/small bench
- Add artwork/wall decor
- Purchase and install window treatments and hardware
- Purchase and install blinds
- Get a nice jewelry armoire
- Create a dream closet with shelves and built-in drawers
- Add a ceiling fan
{see it here}


Master Bath: 5% complete
- Paint
- Frame out the mirrors
- Add artwork/wall decor
- Purchase and install blinds
- Redo all the tile work to something more modern and spa-like (someday)
- Add heated floors (when we redo the tile)
- Paint and stencil the wash closet
- Add shelves to the wash closet
- Change out the light fixtures


Other Bedrooms: 3% complete
- Maybe paint?
- Get a bed and frame for extra guests to sleep
- Possibly create a man cave until the basement is finished?
- Add artwork/wall decor
- Purchase and install window treatments and hardware
- Purchase and install blinds


Laundry Room: 10% complete
- Paint
- Purchase and install a washer and dryer
- Purchase and install cabinets/organization
- Purchase and install a countertop?
- Add artwork/wall decor


Basement (a far off future project): 0% complete
- Finish the space entirely including floors, drywall, paint, electrical, the whole deal
- Possibly stain the concrete floors?
- Install a viewing/theater area
- Maybe add a gym room?
- Create a wet bar
- Add a bathroom?
- Get a pool table


Well, there you have it, the very long list of things that need to get done we would like to get done in this house over the next 30+ years. Hopefully it won't take us that long, but we are definitely going to take our time and do it right the first time (or so we hope). Buying a brand new home has its perks when it comes to warrantees and energy efficiency, but there are a few down sides. For example, no outdoor space, no blinds, no refrigerator or washer and dryer, no paint on the walls, and really, just no character. It takes a lot to make a new white-walled house your home, but we are certainly up for the challenge! This is just an overall list of the major things that I can think of, though I am sure it will grow over time. It will be fun to see how much gets done each year and how long it will take us to truly make this house our own.

Check back for more updates!
JP


Monday, December 30, 2013

Our Crowning Achievement

Yup, I am finally getting around to posting about the family room! I was so excited to post about the Breakfast Nook progress a while back, but ever since then, the rest of the house has been under construction.  I wasn't even able to get Christmas decorations up until the very last minute.

Remember when we were starting this project? Way back when deciding on paint colors, looking for molding? Ahh, it feels so good to be done and to have done it ourselves!


Paint the family room - Check!

Hide the speaker wires with crown - Check!

It feels so good to finally check these big things off our To Do List!! (yes that's worthy of a double exclamation mark!)


Ok, so here is where we started: we had the speakers in the corners of the room with plastic wire hiders to do exactly that, hide the wires. These were up for about a year before we decided to do something with this space. Ya know, the whole paint color decision making process took a while. Opps.

When we were getting ready to start painting, we took a few of the plastic guys down, eliminated some of the slack in the wires, and then drilled a whole at the top of the wall to run the wires down to the bottom of the wall which is where the rest of the outlets are for the electronics. Down the road we are going to have to get a entertainment/console table to hide everything. We like the IKEA one that we have, but it is starting to bow in the middle and crack, not good. For now, it works.


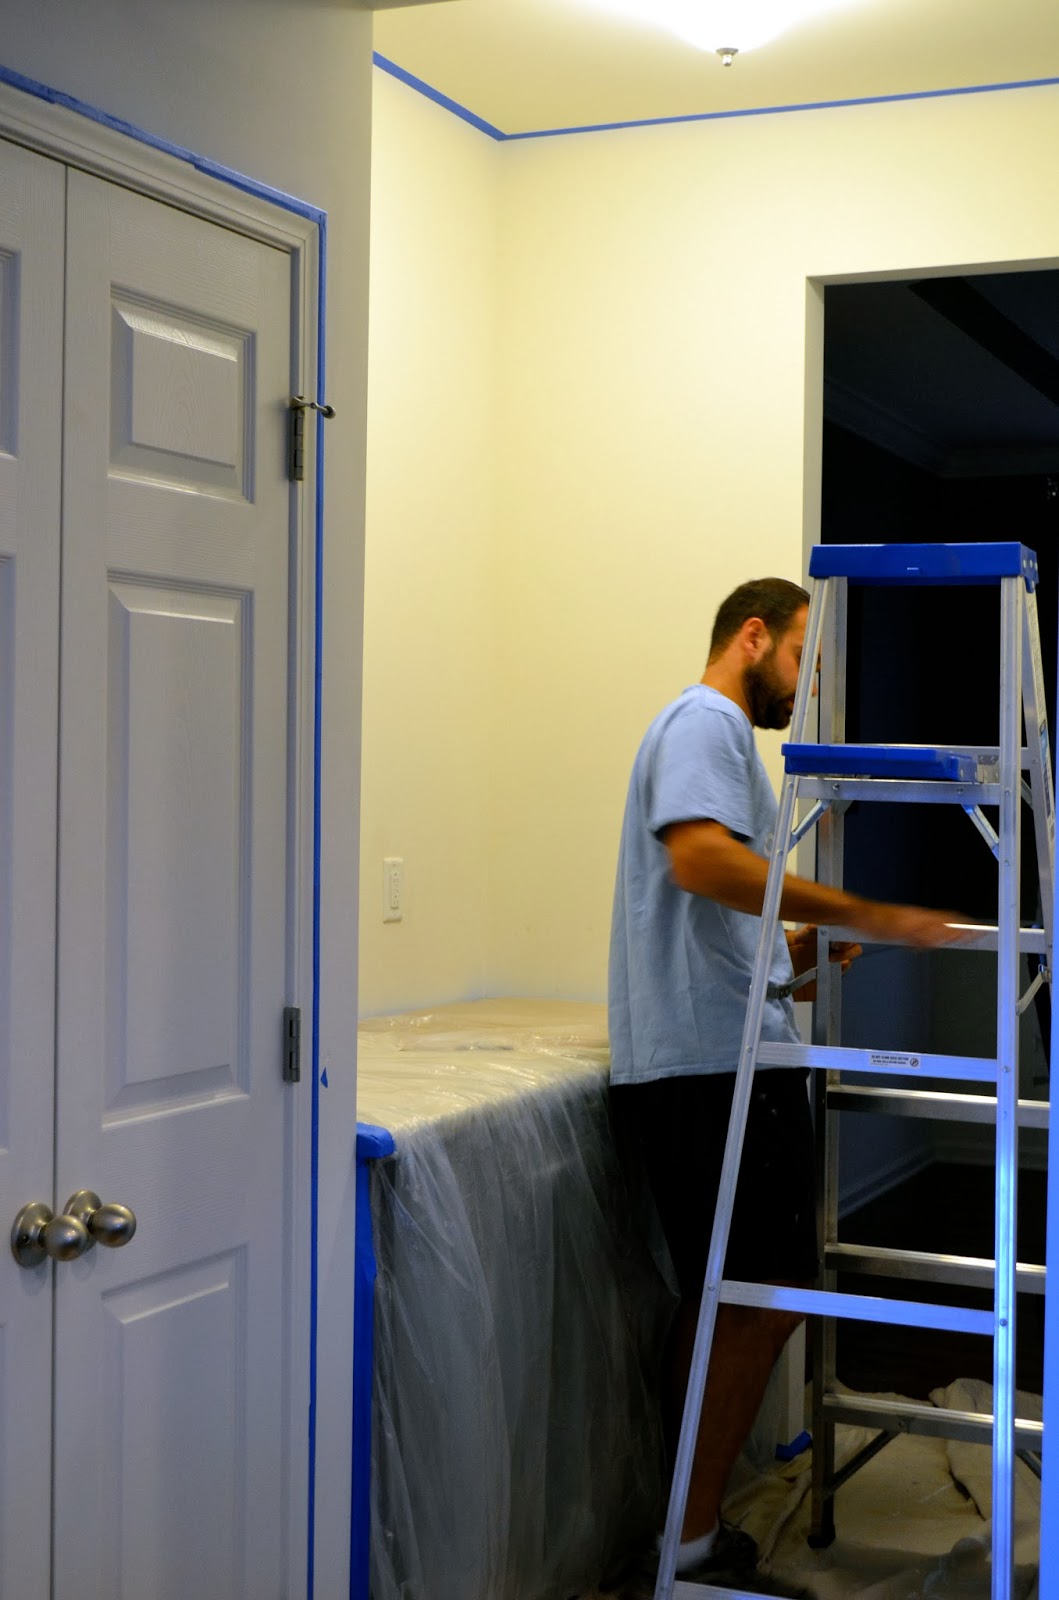
Once we finished getting the wires situated we taped, and taped, and taped some more. Man there were a LOT of edges to tape off in this room. We did the small mud room area too so that took forever.


Thankfully we didn't have to tape off the ceiling since we knew we were putting up the crown, but still, five windows and three doors later, we were exhausted. The TV was the last thing to come down at the request of the hubby : )


Painting took a while too, though it wasn't too bad since we did it over a weekend instead of throughout a whole week like we did in the kitchen. I think we have officially learned our lesson - painting will from now on be reserved for when we have a few days off, NOT a few hours every night after work. We went with the same color as the kitchen - Northern Cliffs by Benjamin Moore. 

Pepper was also a big help during this project as you can see...


... but I cannot take much credit for the remainder of this project either. H did most of the work. Except for a few suggestions from me (we know how men just love suggestions) that actually turned out better than he expected. Like figuring out where the wires were going to come out of the crown before nailing everything up on the wall. Or, having the center speaker wire come from behind the wall instead of the crown so you don't see the it. Yup, that's what I get paid the big bucks for.


The crown is a 4.5" crown that matches the molding we already have in other areas of the house. After the crown was up, all the nail holes were filled with spackle and the edges were caulked. There were also a few gaps that needed to be filled with some painter's putty. All those areas were primed with some run of the mill primer from Home Depot. Then came more taping and more paining before we were totally finished.


I think it turned out great! Even though these photos are a bit on the yellow side (I had no natural light to work with), you can really see the difference of having that finishing touch of crown. And there are no wires in sight! Very Happy. 

Here is what our To Do List looks like now:

- Purchase and hang window treatments (including hardware)
- Purchase and install blinds
- Mount TV on the wall above the fireplace
- Install surround sound speakers 
- Hide the wires somehow with crown!
- Paint 
- Buy new furniture (including sectional, accent chairs, TV console, end tables, etc.)
- Artwork on the walls would also be nice


Not bad. Considering this room was a blank canvas. No paint, no furniture, nothing. I think we are on the right track to get the space looking more like home : ) I think the next step for this room is going to be adding pictures/art to the walls and getting some curtains. Those two things always seem to make a space seem softer and more lived in. Hopefully I can keep those costs down (curtains are surprisingly expensive). Check back for updates as we continue to make this house of ours a home!

- JP


Wednesday, December 11, 2013

Butler's Pantry Update!

We have finally got our butler's pantry where we want it - usable! Ever since we painted we have been saying, "we still have to put up those shelves" "we need to get some liquor for the bar area" "we need to get some artwork for the wall" "ugh, I can't wait to use this space and it not be a collector of stuff!".. Ok, the last two were all me : ) but in all seriousness, the space was just a dumping ground for all things without a home. If we didn't know where to put something, it went in the bar area until we found a space for it. And now...


It's done! (more or less)


Don't mind these iPhone photos, I will get some better ones of this area for the House Tour Page, but for now we are both very excited to finally use this space! It still needs some details, maybe a few photos of friends or something, I don't know. We will see how it transforms over the next few months.

The shelves were a purchase for our old apartment that we were able to reuse here. Originally from Pottery Barn, and absolutely perfect for city life, now they have a new home in our new home! They are housing most (but not all) of our wine glasses and other bar glassware, including these super fun glitter stemmed glasses my MOH made for me for my bachelorette party! Love them. We also have these awesome Delirium beer glasses - where we got these will remain a secret - we have been wanting to display, along with our cocktail shaker and decanter. 

Of course we needed to make room for the main event - the wine and liquor! I wouldn't say the bar is stocked, but we have a good start and I am sure we will accumulate different bottles through the years. (That's if our friends don't drink them all first). I was able to get this great wooden tray from Pier1 on sale and it holds everything that doesn't go in the frig or on the shelf nicely.

The large framed chalkboard was a DIY made from leftover hardboard from when H made his own granite template to save a few $$. I will post later of how that came together and a few cute designs I've used for the holidays! Originally I wanted to hang our fingerprint tree in this spot, but after doing some measuring we realized it wouldn't fit. Womp womp.

So for now, this space is done! And man what a difference it has made! This was an open space, nothing in the nook, no character, nada. And now, it's a great transition between the dining room and kitchen that by DIYing did not cost us too much to do!

I am hoping I can find a picture of the actual "before" shot so you can get a better idea of what we started with. But, for now here is the link to when we started this project.

- JP


Tuesday, November 19, 2013

Breakfast Nook Progress

I am uber excited to share that we are making some progress in this house! Picking paint colors, getting the walls painted, repurposing some old furniture and adding something new, big changes! Ok, maybe not so big, but definitely progress and honestly it is progress I am very happy to share.

H and I have been constantly debating what areas of the house we want to focus on and where we want to spend our money to update those spaces. So we both agreed that the two spaces we use every day should be next in line - the kitchen/breakfast nook and family room. If you remember we were deciding on paint colors and we narrowed it down to two. Well, we finally made up our minds. We decided to go with the darker shade Northern Cliffs and I am so so glad that we did! It is a gorgeous grey color that is a little taupey in some lights and works so well with the dark cabinets in the kitchen. We are using this same color in the family room and already started that project but more on that later.

So here are a few photos of our busy week of painting..


We chose to go with Ben by Benjamin Moore. It was their mid-range paint and since we really didn't need anything too fancy we figured this would do just fine. It was a little difficult to work with since we got it in an eggshell, but after a little while I think H got the hang of it. It covers beautifully, even with one coat, it just left some paint lines where it overlapped. After some trial and error we realized that if you go back over the area you just painted quickly it eliminates those lines. Now we know for next time (the joys of first time DIYers).

Started off in the Butler's Pantry and Pepper was right there wanting to help : )


After lots, and lots, and lots of taping, we moved onto the Breakfast Nook...


Here is what the Butler's Pantry looks like now. Still needs a lot of work. We need to install the wine shelves that we have and some artwork but for now at least it's painted! I will put that in the win column.


And here is the Breakfast Nook.. eeeeh so exciting!


The chairs were a great find from Target. Got them on sale and didn't have to pay for shipping which saved $20. After tax and everything they were under $90 a piece. Who knew chairs were so expensive?! But compared to other stores for almost $300 per chair, I'd say these were a good deal! And they will work in this space for now until we save up some money/find a nice larger table for the space because I am sure we will need to get different chairs. At that point we will then move these into the dining room as head chairs so at least they will serve another purpose down the road. I love their nailhead trim too, it's a great detail that makes them look way more expensive than they actually were!


The table was from our old apartment in the city. It was from IKEA and I am so glad we were able to reuse it. It has a ton of scratches and isn't in the best condition but for now it works. It also expands to fit more people which will work much better for when we have a few friends over instead of having to use the formal dining room. The one major complaint we have though is that it is really low to the ground. The dog can actually rest her head on the table and while it is super cute, it can be really annoying when we are trying to eat dinner. 


The carpet was originally in the foyer and we would like to move it back there at some point but we just wanted to see what the space would look like with an area rug. I think we are going to need a much bigger rug down the road. This is a 5x7 which is fine for the smaller table, but once we have a 6' table (or larger) in here we are going to need at least a 6x9 or maybe even a 7x10.. ugh.. already dreading what that is going to cost. Anyway, this space looks way more finished now. Just need to change out the light fixture. I am thinking this one will work (though I know I can find if for way cheaper) to tie in a metal accent. We also desperately need some color, maybe some fun window treatments or a colorful rug down the road.


Now that this space is "finished" and by finished I mean, finished for now, I think we can hold off getting a table for a little while. I am all about spending a little bit of money to change the way a space feels to make it fit our (my) style and living with it until we can save up some money to make the big purchases that we really want, in this case a really nice table, chairs, and a large area rug. But seriously, what a difference! Check out this before and after:


Progress : ) Oh and here are a few bonus photos of Pepper during the transformation. Hope everyone has a great week!


She apparently didn't like me taking pictures on the floor and ignoring her.


Haha, I love this one! "Who me? I didn't do it!"

Tuesday, November 5, 2013

Master Bedroom

The master bedroom in our new house is proving to be a tough space to decorate. We have done a lot in the room but it is just missing those pretty details that make the space more inviting. It has come a long, long way from being an empty, white-walled space so here are all the things we have done to date.

We found our bedroom set at Ashley Furniture the same day we got our dining room set, more on that here. It was so hard to pick a set that H and I agreed upon! I was oogling over this one bed from Ethan Allen (a very expensive bed might I add). Though it was a lighter wood than I originally wanted, it was beautiful and I just could not get it out of my head. Ashley had one similar but it was white and didn't seem to come in a different color - we were looking for darker wood, something that wouldn't go out of style any time soon. So we looked everywhere and finally found one at Ashley. It just so happened to be one of their top quality sets with the drawers made of cedar and having dovetail joints. Me, I had no idea what that meant, but H seemed to really like it. I believe this was part of the Porter Collection at Ashley.


Now, one thing I always forget is that you can haggle at furniture stores! Yes, that's right, haggle away! (Well, within reason). So we talked the guy down in price and then they added a 50% off discount because it was one of those, "this weekend only" deals, and then we had a multi-room discount because we bought our dinning room set on the same day. Needless to say we got an amazing deal!

Originally I was expecting to get a queen size bed, NOT a king! H had been trying to talk me into a king bed for a while at this point, and I kept saying no because not only is it more expensive to get the bedroom set, but then you have to buy the mattress AND sheets which aren't cheap. So the added expense of getting a king would be more than we originally wanted to spend. H doesn't ask for too much when it comes to furniture or home decor but this was something he wasn't going to let go. It wasn't until we talked to my good friend and MOH at the wedding who "knew a guy" in the mattress business and told us she could get us a mattress for pretty much at cost. This in combination with getting a great deal on the bedroom set changed my mind, and H won the bed size battle. 

When we had the bedroom set delivered we didn't realize that it would be another few weeks before getting the mattress so we had to sleep on our double size mattress on the floor for a few weeks, that was fun! But surprisingly enough it fit in the room with all the new bedroom furniture! I am pretty sure our master suite is larger than our entire apartment was in the city which I know is hard to believe! 

H and I also had some trouble finding a comforter set that we both liked. He was begging me for some color since we just painted the walls grey. We painted the back wall Creek Bend by Behr and we absolutely loved it! But, it was way too dark for the whole room so we painted the remaining walls Porpoise by Behr. This one we did not love. In some lights it has this lavender tint to it and while it is a nice soft grey, purple was not the color we were going for. Oh well, for now it works and maybe down the road we will change it up, who knows. So anyway, we found this orange/grey comforter set at Macy's on clearance and used a $100 gift card we had from turning in our credit card points so I think we paid $50 total for the comforter, two shams, and three accent pillows that all came in the set. It is a bit more masculine that I would like, but it works for the space and it is something that we can change out later on with a duvet cover or something if we feel like it. 


I also purchased two silver colored lamps from Ross and two white/grey lamp shades from IKEA. Though the shades are a bit small for the lamp they work for now. A great alternative to spending an arm and a leg for lamps at other stores, who knew how much lamps could be! 


The mirrors on either side of the dresser were a DIY project. They were hand me downs with a gold frame. So we bought some spray paint, sanded 'em down, and went to town with the white gloss paint. I wish I had some before and afters for this project because a little bit of paint really does go a long way. We are thinking we might rehang them a bit higher, but for now they frame out the space nicely. Oh and PS, don't mind the mess!


Here are a few more detail shots of the room.


I would eventually like another chair in the seating area and a stand mirror for the far left corner.


We really love how the room turned out but as I said before, it is very masculine. I think I need to find some nice artwork for the walls or just a few soft touches to make the place more inviting. I am trying to keep track of where I get all the decor items so here goes:

  • Curtains - IKEA (though they still need to be hemmed)
  • Curtain rods - Home Depot
  • Love pillow - Home Goods (left over from our wedding)
  • Ceiling fan - Hunter brand at Lowes
  • Decorative frames above the bed - Pier One (on sale! 20% off!)
  • Comforter and bedding set - Macy's
  • Lamps - Ross
  • Lamp Shades - IKEA
So, now here is what our to do list looks like:

- Purchase bedroom set
- Paint the room
- Purchase a comforter set
- Buy and hang window hardware
- Buy and hang curtains
- Reupholster love seat
- Find colorful artwork/frames for the walls
- Put up crown molding <- if H lets me : )
- Print four 4x4 pictures to fill the frames above the bed
- Hang TV on wall above the dresser (maybe)
- OR hang a gallery wall of wedding photos above the dresser
- Purchase a white print tufted bench
- Buy a floor lamp for behind the love seat
- Purchase a side/end table for seating area
- Possibly purchase an accent chair?
- Find or make a jewelry stand armoire with a mirror front

Most of these things are details and can be hammered out over time. I am so glad that we have this space more or less finished now. It will be even better when we get the master bath painted! Then we will really have our own little retreat : )

Check back for updates!
JP