Wednesday, December 11, 2013

Butler's Pantry Update!

We have finally got our butler's pantry where we want it - usable! Ever since we painted we have been saying, "we still have to put up those shelves" "we need to get some liquor for the bar area" "we need to get some artwork for the wall" "ugh, I can't wait to use this space and it not be a collector of stuff!".. Ok, the last two were all me : ) but in all seriousness, the space was just a dumping ground for all things without a home. If we didn't know where to put something, it went in the bar area until we found a space for it. And now...


It's done! (more or less)


Don't mind these iPhone photos, I will get some better ones of this area for the House Tour Page, but for now we are both very excited to finally use this space! It still needs some details, maybe a few photos of friends or something, I don't know. We will see how it transforms over the next few months.

The shelves were a purchase for our old apartment that we were able to reuse here. Originally from Pottery Barn, and absolutely perfect for city life, now they have a new home in our new home! They are housing most (but not all) of our wine glasses and other bar glassware, including these super fun glitter stemmed glasses my MOH made for me for my bachelorette party! Love them. We also have these awesome Delirium beer glasses - where we got these will remain a secret - we have been wanting to display, along with our cocktail shaker and decanter. 

Of course we needed to make room for the main event - the wine and liquor! I wouldn't say the bar is stocked, but we have a good start and I am sure we will accumulate different bottles through the years. (That's if our friends don't drink them all first). I was able to get this great wooden tray from Pier1 on sale and it holds everything that doesn't go in the frig or on the shelf nicely.

The large framed chalkboard was a DIY made from leftover hardboard from when H made his own granite template to save a few $$. I will post later of how that came together and a few cute designs I've used for the holidays! Originally I wanted to hang our fingerprint tree in this spot, but after doing some measuring we realized it wouldn't fit. Womp womp.

So for now, this space is done! And man what a difference it has made! This was an open space, nothing in the nook, no character, nada. And now, it's a great transition between the dining room and kitchen that by DIYing did not cost us too much to do!

I am hoping I can find a picture of the actual "before" shot so you can get a better idea of what we started with. But, for now here is the link to when we started this project.

- JP


Friday, December 6, 2013

Roasted Vegetables - Thanksgiving Made Easy

So I hope everyone had a wonderful Thanksgiving! I know it was last week but I wanted to share this super easy recipe that I made this year using random veges we had from our CSA {part 2}. 


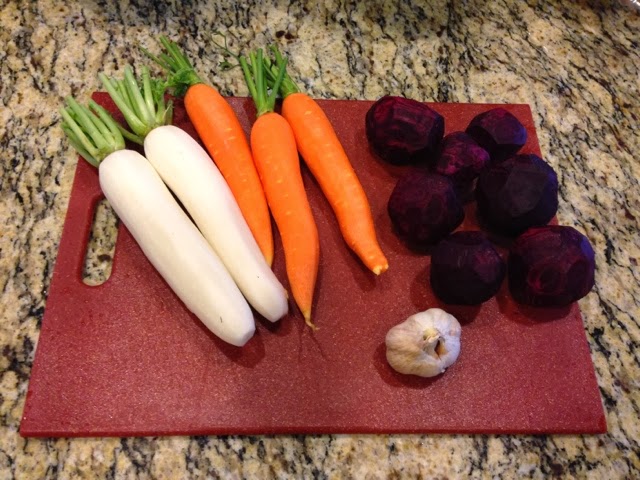
These beauties are all root vegetables: Daikon Radishes, Carrots, and Beets, with of course, some garlic thrown in for good measure : ) But, you could really use any hearty vegetables. I like to throw in some sweet potatoes when I have them or turnips. 


I just chopped these bad boys up and threw them in a roasting pan with whole cloves of garlic, tossed them with some olive oil, salt, pepper, and dried herbs (I used rosemary and thyme, but you can really use just about any seasoning) and Voila... a healthy alternative to the candied carrots and sweet potato casserole loaded with butter and sugar. Now, don't get me wrong, I love those dishes as much as the next person, but it is always nice to have a healthier (and vegan, yay!) alternative.


The beets really give this dish a nice color and create a sweet balance for the tangy radishes. This made plenty of food for a handful of people with very few ingredients and it was super easy. That's my kind of Thanksgiving side dish!

Happy Belated Thanksgiving Everyone!!
JP

Monday, December 2, 2013

Cheddar Ale Soup

Cheddar cheese and beer, what could be better? Another keeper from my Soup of the Day book (in case you can't tell, it is one of my favorite cook books). I paired it with some good crusty bread but I think it would be perfect with some pretzels and an ice cold beer.. mmm. I haven't tried to make my own pretzels yet, but a girlfriend of mine did one night we were hanging out and man were they good! We had different German beers and dips for the pretzels, the only thing that night was missing was this soup!


Ingredients:

- 1/2 cup unsalted butter (4 oz.)
- 1 leek (pale green and white parts) thinly sliced
- 1 carrot, peeled and diced into 1/2 inch pieces
- 1 celery rib, diced into 1/4 inch pieces
- 1/2 cup flour
- 1/2 tsp. dry/ground mustard
- 4 cups chicken broth (must be chicken, I wouldn't sub vege for this one)
- 1 bottle of a good ale (New Castle or Bass was recommended)
- 2 cups shredded sharp cheddar cheese
- 1/4 cup grated Parm (or any other hard cheese like Romano would work)
- Pinch of cayenne pepper
- 1 tsp. worcestershire sauce
- Salt and freshly ground pepper

Directions:

- In a large pot, melt butter over medium heat
- Add the leek, carrot, and celery, saute until soft, about 10 minutes


- Season with salt and pepper, then stir in flour and mustard
- Cook for about a minute until incorporated
- Add the broth and ale, bring to a simmer over high heat


- Reduce heat to medium and cook, whisking to break up any flour clumps, for 5 minutes or until thickened slightly
-  Add the cheeses and whisk constantly until completely melted, 3-5 minutes


- Note: Don't let the soup boil or it might wind up stringy - not good
- Stir in the cayenne and worcestershire, season with a little salt and pepper before serving


Enjoy!
JP

Monday, November 25, 2013

Eggplant Parm - An Experiment

My husband and I both dislike hate eggplant. We avoid it at all costs. But when we started getting them from the CSA (CSA Part Two) I just couldn't see not at least trying to do something with them to make them more edible. So what better way to make something taste better than fry it up and cover it with cheese?!

I have made Chicken Parm a hundred times. I don't do anything special, just bread it using a three step process, pan fry to get it golden brown, and then finish it in the oven with sauce and mozzarella. Simple. Time consuming, but simple. I figured, why not try to do the same thing with the eggplant. I was just getting started and had to take the dog out, started up a conversation with our neighbor (whom we get alone so well with, definitely lucked out there!) and they were saying that the key to getting that bitter taste out of the eggplant is to squeeze out the juice. Who knew?! So I put a weight on the slices and let it sit for a little while. They told me to let it go for an hour or two, an hour or two I did not have. So I just did my best and it seriously made all the difference!

I started by slicing the eggplant really thin and let it sit for a little while on paper towels with a weight to extract the juice...


Then breaded and pan fried... 


After, it looked like this, much more appealing...


I added some sauce and fresh mozz...


Cooked it in the oven for about 20 minutes at 350, made some spaghetti and voila...


I think it turned out pretty good! And so did my husband.. win, win!


Just goes to show you that you may think you don't like something but if you change it up (or get some advice from a friend) you may just surprise yourself!

JP

Tuesday, November 19, 2013

Breakfast Nook Progress

I am uber excited to share that we are making some progress in this house! Picking paint colors, getting the walls painted, repurposing some old furniture and adding something new, big changes! Ok, maybe not so big, but definitely progress and honestly it is progress I am very happy to share.

H and I have been constantly debating what areas of the house we want to focus on and where we want to spend our money to update those spaces. So we both agreed that the two spaces we use every day should be next in line - the kitchen/breakfast nook and family room. If you remember we were deciding on paint colors and we narrowed it down to two. Well, we finally made up our minds. We decided to go with the darker shade Northern Cliffs and I am so so glad that we did! It is a gorgeous grey color that is a little taupey in some lights and works so well with the dark cabinets in the kitchen. We are using this same color in the family room and already started that project but more on that later.

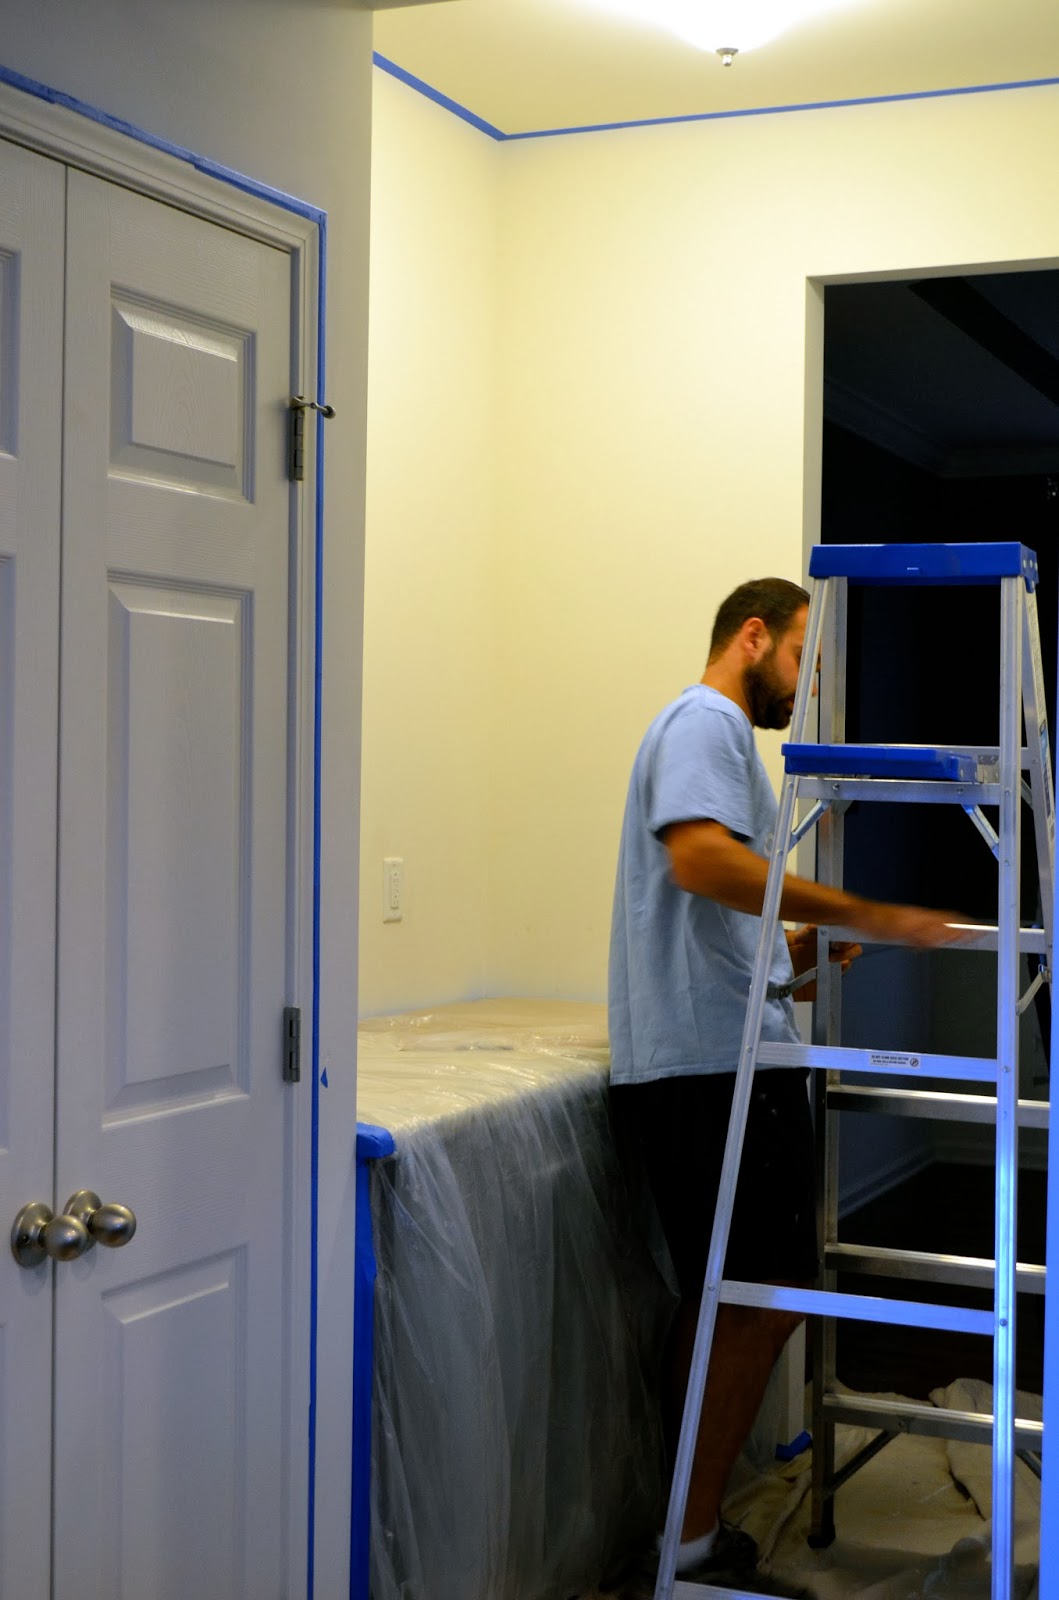
So here are a few photos of our busy week of painting..


We chose to go with Ben by Benjamin Moore. It was their mid-range paint and since we really didn't need anything too fancy we figured this would do just fine. It was a little difficult to work with since we got it in an eggshell, but after a little while I think H got the hang of it. It covers beautifully, even with one coat, it just left some paint lines where it overlapped. After some trial and error we realized that if you go back over the area you just painted quickly it eliminates those lines. Now we know for next time (the joys of first time DIYers).

Started off in the Butler's Pantry and Pepper was right there wanting to help : )


After lots, and lots, and lots of taping, we moved onto the Breakfast Nook...


Here is what the Butler's Pantry looks like now. Still needs a lot of work. We need to install the wine shelves that we have and some artwork but for now at least it's painted! I will put that in the win column.


And here is the Breakfast Nook.. eeeeh so exciting!


The chairs were a great find from Target. Got them on sale and didn't have to pay for shipping which saved $20. After tax and everything they were under $90 a piece. Who knew chairs were so expensive?! But compared to other stores for almost $300 per chair, I'd say these were a good deal! And they will work in this space for now until we save up some money/find a nice larger table for the space because I am sure we will need to get different chairs. At that point we will then move these into the dining room as head chairs so at least they will serve another purpose down the road. I love their nailhead trim too, it's a great detail that makes them look way more expensive than they actually were!


The table was from our old apartment in the city. It was from IKEA and I am so glad we were able to reuse it. It has a ton of scratches and isn't in the best condition but for now it works. It also expands to fit more people which will work much better for when we have a few friends over instead of having to use the formal dining room. The one major complaint we have though is that it is really low to the ground. The dog can actually rest her head on the table and while it is super cute, it can be really annoying when we are trying to eat dinner. 


The carpet was originally in the foyer and we would like to move it back there at some point but we just wanted to see what the space would look like with an area rug. I think we are going to need a much bigger rug down the road. This is a 5x7 which is fine for the smaller table, but once we have a 6' table (or larger) in here we are going to need at least a 6x9 or maybe even a 7x10.. ugh.. already dreading what that is going to cost. Anyway, this space looks way more finished now. Just need to change out the light fixture. I am thinking this one will work (though I know I can find if for way cheaper) to tie in a metal accent. We also desperately need some color, maybe some fun window treatments or a colorful rug down the road.


Now that this space is "finished" and by finished I mean, finished for now, I think we can hold off getting a table for a little while. I am all about spending a little bit of money to change the way a space feels to make it fit our (my) style and living with it until we can save up some money to make the big purchases that we really want, in this case a really nice table, chairs, and a large area rug. But seriously, what a difference! Check out this before and after:


Progress : ) Oh and here are a few bonus photos of Pepper during the transformation. Hope everyone has a great week!


She apparently didn't like me taking pictures on the floor and ignoring her.


Haha, I love this one! "Who me? I didn't do it!"